
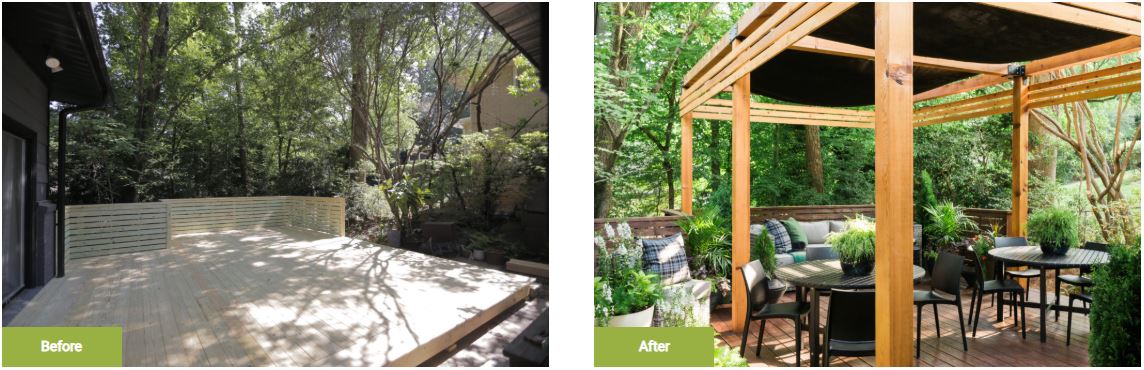
Before & After
Click here to watch the step by step process outlined below.
Step 1: Choose Species
When building your client’s pergola, be sure to consider their region, home’s architectural style and landscape when selecting the appropriate softwood species. There are so many options to choose from at a variety of price points. For this project, though, we went with Western Red Cedar. It’s beautiful, durable and naturally resistant to rot, decay and insect attacks.

Step 2: Site Plan & Permits
Any project that’s structural like this will require site plans, along with permitting. A site plan is also helpful in making sure you stay on track with material needs and the finer details of your project. This pergola is being constructed atop a deck (built on top of an existing stone patio, so no concrete footings were necessary).

Step 3: Location of Posts
Using our plans and the deck’s joists to guide us, we measured and marked where each pergola post would be located on the deck. This design required 6 posts, spaced about 10 feet apart. It’s imperative each post is located next to joists, so it can be properly anchored to one.
HINT – Look for nails in the decking.

Step 4: Plunge Cut Into Decking
Using a circular saw, we cut into the decking where each post would be located, then pried up additional boards as needed to access the joists below. You’ll need a good twelve inches of access on one side of the location so you can get in there with a drill, so keep this in mind.

Step 5: Prep Post & Joists
Once we had access to the interior of the deck, we set the post in place, shimming with 2×6 boards when necessary, then making sure the post itself was level and plumb. We then drilled through the deck joists and pergola post with a ½ inch bit to prepare the post for two bolts.

Step 6: Hammer in Carriage Bolts
Next, we secured each post to the deck’s joists by hammering in two 10- inch carriage bolts. Make sure your bolt is long enough to go through one deck joist, the post and through another deck joist with room for a washer and nut to be added onto the end.

Step 7: Tighten Nuts with Wrench
Next, after checking again for level and plumb, we tightened up each nut using an air wrench (you can also use a socket set).

Step 8: Brace Posts with 2x4s
Once each post was secured, we temporarily braced it with a 2×4, nailing it to the deck to help keep the cedar post level and plumb during the build.

Step 9: Re-Install Decking
Re-install any long boards that you removed to access the interior of the deck and make any cuts you need so that the decking snugs up nicely to the newly installed pergola posts.

Step 10: Mark & Trim Posts
We popped a chalk line from one outermost post to another, then we trimmed the posts to the desired height using a circular saw. You’ll likely have to make these first cuts with a circular saw and finish up with a reciprocal saw, depending on size of your post.

Step 11: Add Braces
Next, we attached heavy-duty braces to the top of each post, by drilling a pilot hole, then securing with stainless steel lag bolts using an air drill to get a snug fit quickly. Our braces were custom fabricated to suit our pergola design.

Step 12: Measure & Cut Beams
We then measured the distance between braces and cut each beam to size. We laid the beam atop the posts and inside the braces to ensure a good fit. You’ll need a couple of friends for this part of the job, as these cedar posts are no joke!

Step 13: Secure Beams
We secured the beams into place using more stainless steel lag bolts.

Step 14: Add Decorative 1×4 Slats
To give the pergola a bit more architectural interest, we sanded and secured 1×4 cedar boards to the upper perimeter using a nail gun.
PRO TIP – Using a chalk line, mark where all your slats will be located before installation begins to ensure equal spacing.

Step 15: Seal and Stain
Once the structure was fully built, we finished the pergola with a clear stain that will protect yet let the beauty of the Western Red Cedar show through. Though we chose a clear stain, a tinted stain is an option because of its greater longevity (service life). We then stained the deck below using a complementary medium brown.

Step 16: Add Shade Hardware
Removable shades were part of our design, so we attached a stainless eye hook to each corner to accommodate the clips/shades. Screw the eye hook into the top side of the beam.

Step 17: Add Shades
Last, we fastened the grommeted shades to the pergola’s eye hooks using stainless carabiners.


