
The goal was to make the house look bigger to increase curb appeal and add some pizzaz to the front of this tired old house. We also wanted to add an outdoor entertaining space and take advantage of the beautiful country setting.
When it came to designing the deck there were a few items we had to work around. First, we wanted to be careful of the masonry and foundation on our 80-year-old cottage and second we had to build the deck across a sloped yard to tie into the height of the existing porch. Here’s how we did it:
Step 1: Obtain Plans and Permits
We used a user friendly online deck design program to create a plan that met code requirements for our area and included a materials calculator. We fine-tuned the plans for our site location and conditions, then submitted them for a permit.

Step 2: Mark the Layout
Once our design was approved, we used stakes and string to mark the layout. Checked the square by measuring from corner to corner on both sides and adjusted until it came out even. Once we were happy with the layout, we used bright spray paint to mark the perimeter and footing locations.

Step 3: Create the Footings
We dug holes per our local code then tamped gravel into the bottom of the holes and placed cardboard forms with rebar into each hole. We used high strength concrete mixed to a thick consistency that we compacted into each hole. We inserted a J bolt into the center of each footing, leaving one inch exposed. After all of the j-bolts were in place, we ran a string across them and adjusted them till they were all aligned.

Step 4: Attach the Posts
We let the concrete cure overnight then we attached post holders onto each of the footing bolts. We cut the posts a few inches long and screwed them into the post holders. After all of the posts were in place, we marked and cut them to their final height to ensure that our new deck would line up perfectly with the existing porch.

Step 5: Treat cut ends
Throughout the project, all of the cut ends were treated with a copper naphthenate solution. This solution can be visible through stain so it is important to apply with care.

Step 6: Place the Beams
Next we glued and attached 2X10’s into 26 foot long laminated beams following the prescriptive code for nail placement, and made sure that all interior splices would be centered over a post. Then we placed the beams onto the posts and secured them with split post holders. We sealed the top of the beam with waterproof tape.

Step 7: Install the Joists
Next we secured the rim joists to the outside edge of both beams and made sure that everything was squared up. We marked the joist locations 16″ on center along both of the beams. Then we measured each location and cut a joist to that size. Next we toenailed the joists in place and then then secured them with joist hangers.

Step 8: Apply the Decking
We started installing the decking on the outside edge of the deck, securing them to each joist using a nail gun and 3- inch galvanized ring shank nails. We left a 1/2” overhang to lap over the deck skirt. We cut the deck boards so that all of the seams overlapped joists and kept the seam placement random. As our decking was dry we used an 8d nail to give us a 1/8” gap between all of the deck boards.

Step 9: Trim the Decking
We left all of the decking planks long, once all of the decking was down we snapped a chalk line and trimmed the excess to achieve perfectly uniform ends.

Step 10: Apply Stain Sealer
We applied a penetrating stain sealer to protect the deck from moisture, mold and UV rays. We chose a dark walnut color to enhance the natural beauty of the wood.

Step 11: Attach Cross Bracing
We attached cross bracing to all of the posts taller than 2 feet to prevent racking. The bracing should be a minimum of 2 feet down the post and connect to the beam 2 feet away from the post and create a strong 45 degree angle of support.

Step 12: Install Railing Posts
We notched the decking for each post location so that the posts would mount flush to the beam and rim joist. Then we cut and attached 4×4 posts using 1/2” carriage bolts making sure that they were plumb. On the rim joist end blocking and tie down anchors were added as per code. The posts were cut long so that after they were installed we marked and cut them to level.

Step 13: Attach Railing and Spindles
We attached 2×4 railings at the top and bottom of the posts per code, then nailed spindles to the railing and capped with a handrail that was painted to match our trim color.

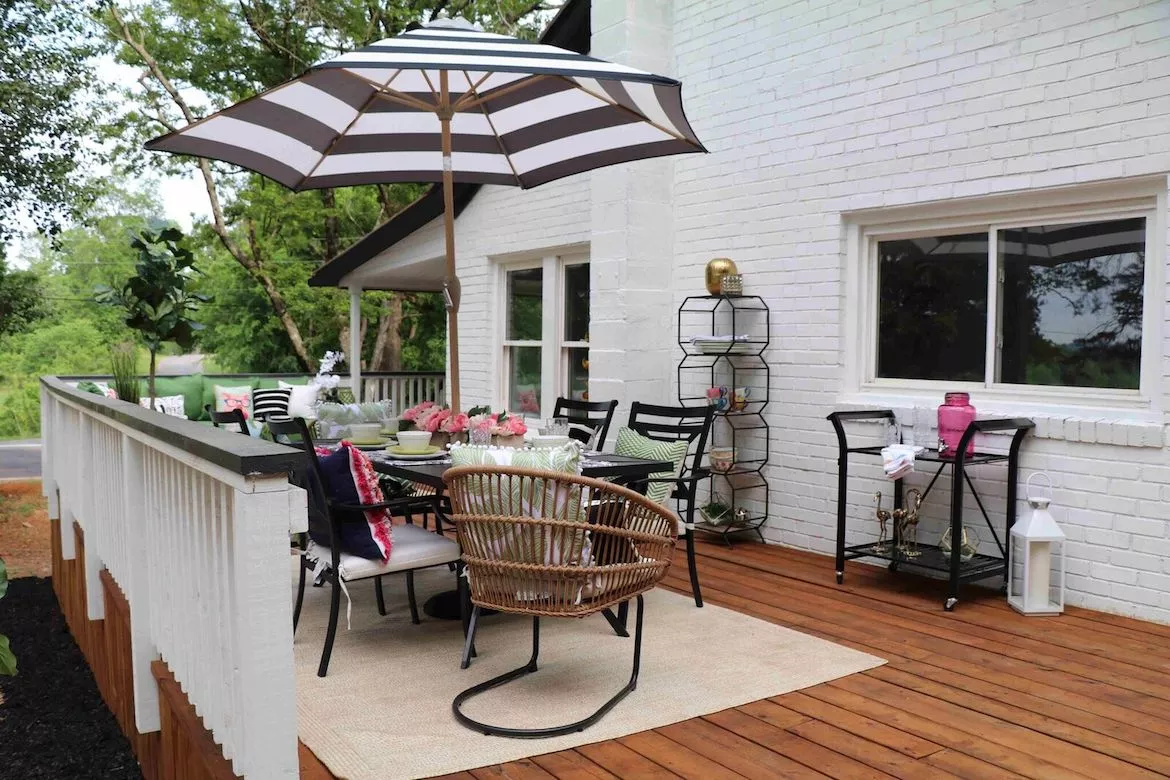
Step 14: Enjoy Your New Deck
We absolutely love how the deck turned out, it is the perfect spot to welcome guests and entertain. The natural beauty of the real wood adds an elegance and appeal that makes our little cottage feel like a home.


